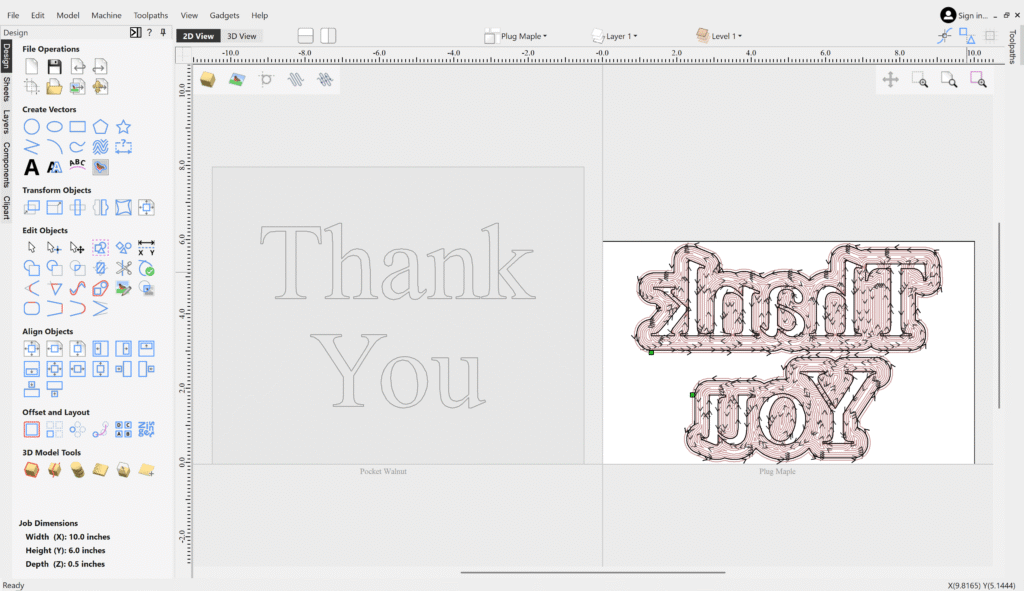
Mastering VCarve Inlay: Choosing the Right Bit & Correct Bit Depth Settings
If you’re learning how to create a beautiful CNC inlay using VCarve Pro, choosing the right V‑bit and setting correct start/flat depths are key to achieving snug-fitting, professional-quality results. This beginner-friendly Mastering VCarve Inlay guide covers some of the most important details you need to know. If you find this guide helpful and would like to master these techniques with expert guidance in a hands-on class, register for here for our CNC Inlay Cutting Board Class.
1. Why Choose a V‑Bit for Mastering VCarve Inlay?
Using a V‑bit (typically 30° or 60°, sometimes as low as 15°) allows for tight, self-wedging corners and sharp edges—something round-end bits can’t achieve. As explained on CNC forums, “The V‑cut bit creates sloped edges so the inlay wedges itself into the pocket.” That results in clean corners and less gap around edges.
A 60° V‑bit is popular—it provides a wider glue surface and cuts cleanly (we prefer the Astra HD coated bits from Bits & Bits). A 30° bit may be better for fine detail, but only if it’s precisely manufactured at that angle.
2. Recommended Bit Angle by Design Complexity
- 60° V‑bit: Ideal for broader, bold designs—balances speed and glue surface.
- 30° V‑bit: Best for detailed or fine-line artwork.
- 15° V‑bit: Used when extreme detail is required; keeps total cutting depths shallow (under ~4 mm)
3. Bit Depth Settings: Start and Flat Depth Explained
Correct depth settings are essential for a tight fit. Most users follow the 3:2:1 formula:
- Pocket (female) depth = 3 units
- Inlay (male) inserts = 2 units
- Glue Gap = 1 unit
Example in inches:
- Pocket max (bottom) depth: 0.200″
- Start depth for male (plug): ~0.133″
- Flat depth (finish cut): ~0.067″
This combination ensures the inlay sits just shy of fully seated—allowing glue without wobble.
A community example: female pocket depth of 0.20″, male plug start at 0.10″, paired with same max depth yields excellent fit and minimal gap
VCarve Pro toolpath terms vary slightly:
- Flat depth = how deep the pocket gets
- Glue gap = clearance between plug and pocket bottom
- Surface clearance = small buffer between plug top and material surface
4. Workflow for Mastering VCarve Inlay in VCarve Pro
- Select the same V‑bit for both Pocket & Plug toolpaths to ensure fit—if you change bit, delete and regenerate both toolpaths
- Pocket toolpath (female): Set bottom flat depth to desired total depth (e.g. –0.20″)
- Plug toolpath (male):
- Start depth: somewhere above the pocket floor (e.g. –0.13″).
- Flat depth: typically remaining depth (e.g. –0.20″).
- Enable clearance tools if needed for end mill cleanup.
- Use simulation preview before cutting to check fit and leftover material.
5. Preventing Tear-Out & Fit Issues
- On dense woods like walnut or maple, start with a cleanup pass (flat end mill) before the V‑bit pass to minimize tear-out
- Use proper feed/spindle speeds: some users find 18‑20 k RPM and lower IPM minimize fuzzies, followed by a final high-speed V pass final clean-up
- Always do test inlays on scrap material to dial in settings
✅ Quick Reference Table
| Bit Angle | Start Depth | Flat Depth | Glue Gap | Ideal Use |
|---|---|---|---|---|
| 60° V‑bit | ~0.10″ | 0.20″ | ~0.10″ | Bold designs & sign inlay |
| 30° V‑bit | ~0.13″ | 0.20″ | ~0.07″ | Fine details and tight fits |
| 15° V‑bit | Total under 4 mm | ≤~4 mm | Small | Miniature or high-detail art |

I found your information beneficial but it lacked some clarity. What’s missing is a sketch that clearly identifies the terms. Words can be misinterpreted while a sketch has greater clarity. In particular, “flat depth” is not clear. Is it the depth of the female pocket or is it the depth that the male plug extends into the female pocket.
thanks for the feedback, I might rewrite this and add some illustrations to better clarify. Flat depth is a way of limiting the cut depth (or establishing a maximum cut depth) in the deepest area in the V groove. When V carving, it is a common practice to include a flat depth so the V cutter doesn’t cut through the material when establishing the total width of a V channel.